Wednesday, August 4, 2010

FOUNDATION COMPLETE!

The foundation is finally done, all it all it went great. We learned a few things along the way, so the next one should go even smoother. We used GreenBlock ICF's, and were very impressed with them. We had to modify the blocks a bit o make them work, so the corners needed to be fastened with lumber, zip ties, and banding, but the circular shape made it very strong. Lots of pics to share, here they are.

We did vertical rebar, 2 per panel, close to the corners, then one horizontal row around the top.

This is the dry fit, the corners were fastened with 175 lb rated zip ties, the ties held them in place until we were able to get the bracing and banding on.

Looks small, but when its finished we'll have 1700 sq/ft (including the finished basement and loft.


Standing in the mudroom, with my back the spiral staircase. Finished slab will be 6" higher than what I'm standing on.

These 2x6's are our connection detail for the inside corners. There is a nailing strip inside the foam blocks, one 3" screw through the 2x6, into each block, secures the blocks together. We'll also be reusing them as top plates in our wall panels.


Lucas and Sophia having fun, Lucas got a hard cast put on today, he'll heal fast, hes a trooper.

The banding seemed thin so we ended up adding a couple more rows along the bottom, and near the middle of the wall, better safe than sorry. You can see the "whiskey barrel effect.

Calling it a day, but the girls wanted one more shot.

Bracing on the inside of the walls was all we needed. To my amazement we didn't need a single brace on the outside. By bracing the inside level, there was no where for the wall to go. The beauty of a circle :)

The squares near the top of the wall were there for exterior bracing.

We are fortunate enough to have a neighbor in the well business. He runs a pounding rig. He figures he'll be there a week or two, but how great is that truck. Do some research on pounding VS drilling wells. We're learning something new every day.


This means its time to build panels. Feeling very good to have this foundation behind us. Its been haunting dad and I from the beginning. I knew we could do it, and we save a small fortune by doing it ourselves.


Friday, July 9, 2010

Slab prep/perimeter drains

Quick post, not a lot to share, but got back to Milton today to do a little hand work. getting the slab base ready, still need to compact and set drainpipe. but we need some rain, its a dust bowl right now. Here a a few pics, now the footings are complete and the frost wall is backfilled.


Thursday, June 24, 2010

More footing work....

Last Thursday Dan and I dragged the pop up to the land, we did a little work before running out of daylight and energy. We still had a bit of work to do before the concrete arrived on Friday morning. Dad got there bright and early, and we puttered around until a respectable time to fire up the generator (haven't met all the neighbors yet)

Monique, Sophia, Jake, Bob and Laurel all got there just in time to help back fill a few of the footing forms, and wait for the truck to show up. All in all it was a quick pour, and good thing it was, because it was a hot one, and there aren't too many places to get out of the sun on that lot. Monique got lots of pics, so here they are.


Saturday, May 29, 2010

Frost wall footing

We had another productive day in Milton. Dad and I met at the lot. We started trying to lift the well point up. When we worked on it last, we got greedy and tried to drive one more 4' section, hoping for more volume. We got the volume in the pipe, but it drove very hard, and our guess is that we are in a vein of clay. Our problem is that the point screen is probably clogged, so we're not having any luck pumping the water out. The plan is to try to lift the point backup, sacrifice some volume, and hope that we get above the vein we're in right now. We tried using the dump body on the 1 ton, but didn't have any luck. Next time the skid steer is up there, we'll give it another try.

After walking away from the well point, we focused on laying out the footing. Dad got working on that while I took off to get materials for mixing the concrete. By the time I got back, stakes were set and we worked together to make sure the forms were right where they needed to be.

Since we haven't had luck with the well yet, we went for a drive down the road to the closest river, and filled up a 30 gal trash can, and a few mud buckets. It took us a couple hours to get the footing poured. I mixed from the dump truck, and dad stayed in the hole. We had a "red neck concrete shoot" an old stove pipe screwed to a piece of scrap wood, tied to a wheel barrow, wasn't pretty, but saved our backs, that's for sure.

I went back the next morning to strip the forms, everything looks good. Time to form up the frost wall, center pad, and most of the main footings. We'll have a truck for that pour. Then back fill the frost wall and tie the main footings to the frost wall. We're getting there.

Here are some pics:


Thursday, April 22, 2010

Breaking Ground

Once again, its been a while, so here's the latest. We finally have a building permit in hand, and with this we've been able to get the ball rolling. A roof kit deposit has been mailed, we're expecting a delivery at some point in September. This will give us time to get the foundation up, and be fabricating the panels in Newmarket. We're hoping to be weather tight this fall, then spend some time working on the interior during the winter months.

Today, dad and I spent the day in Milton Mills. Wayne Rosa hauled his excavator to the lot, and he was able get the septic tank installed, dig out for the frost wall, and help us get a hole started for the well point (okay, he dug us a hole about 16 feet deep, so it was a little more than a start :) Before we left the lot this afternoon we have about 5 1/2 feet of water in the pipe. We are looking forward to getting the pitcher pump attached and priming the well. Hopefully the water will test fine and we're hoping the point will be sufficient for time being, at least through the construction.

Here are a few pics of today's progress, no particular order.

point is about 18' deep right now, we'll be driving one more length of pipe.

here's where the frost wall is going.


tank is set, if anyone has to go...


moving backwards...

backwards again....

Thursday, January 21, 2010

updated pic of finished step


Here is a shot of the first finished tread, The last pics didn't have the original riser connected yet. Now they are assembled, plugged, but are still waiting to be sanded.

Wednesday, January 13, 2010

Spiral staircase

Its been a while, but we have been busy with the house plans, here's the latest.

For those who don't know, we found a great used mahogany spiral staircase on craigslist about a year ago, its been sitting in the basement collecting dust until now. We've been going back an forth in every different direction with the wall surrounding the staircase, but we've got it finalized, so we're getting started.

With a few changes, it will meet all the current building requirements for a spiral staircase. Here are a few before pictures, and some up to date pictures of the changes we've made. I'm going to have some house plan pics up soon too.

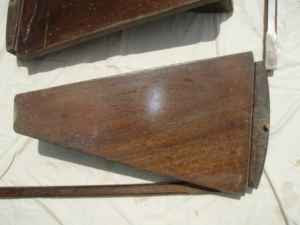
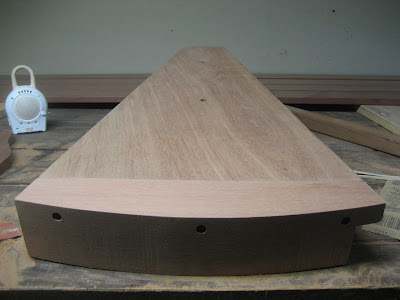
These are the treads, 18 total. We need to make up a couple more to complete the staircase from basement to loft. The diameter of the staircase is 5'.


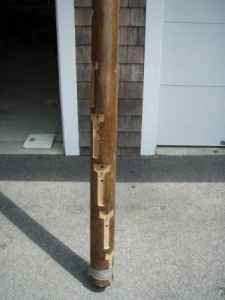
This is the center post, each tread is recessed into the post 1/2" then connected through the back with a 6" bolt. There are receiving "barrel nuts" inside each tread and riser. Should make for a very sturdy staircase. A friend of my father was able to make us up the barrel nuts we'll need for the additional steps.Add Image

Add Image

Here is the tread taken down with 80 grit, still some sanding to go, but you can see how nice the wood is going to look.

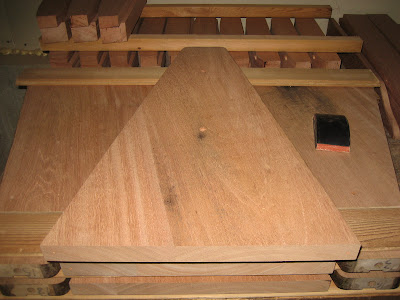
These are the new end pieces, we started with 4x4 mahogany deck posts, color is a bit more red, but I like the contrast, and everything is going to darken with time.

The end piece, countersunk, glued and screwed :)

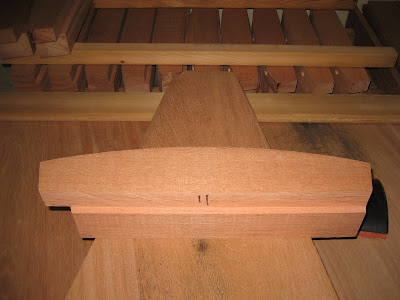
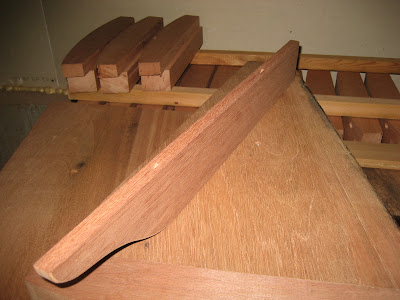
This piece will close the riser spacing to the required 4" maximum. Maybe overkill, but not worth getting called out by a building inspector. Much easier to do now rather than later.