Monday, March 5, 2012

Mission Complete !!

Here are some pics, no paricular order...


Monday, September 12, 2011

we're still alive....


Well..... needless to say, between work and and the house, I have not had time to keep up with this blog, but that just means that we have a lot of pictures to share.

We just got back from a week in Milton working strictly on the staircase, and I wanted to get some pictures posted. We're planning on an occupancy permit by November at the latest. Still some work to do, but it should be ready "to occupy."

For those who don't know, Jameson is due in a week! He'll be here before we know it. One of our next projects will be curved baby gates for the spiral staircase.....should be fun :) Here are the pics


Radiant in slab: Many thanks to Mike from Traditional Trades, for taking the time to lay this out with me, I wanted to go a different route, but his design gives us complete control over the heat in the slab within the three circuits. I would have regretted doing it any other way.


High density Rock wool insulation. Its r-25 in a 2x6 bay. the best you can get out of batt. As much as we would have liked to do spray, between the batt insulation and the 1" foam under the siding. we're up around r-30 in the walls


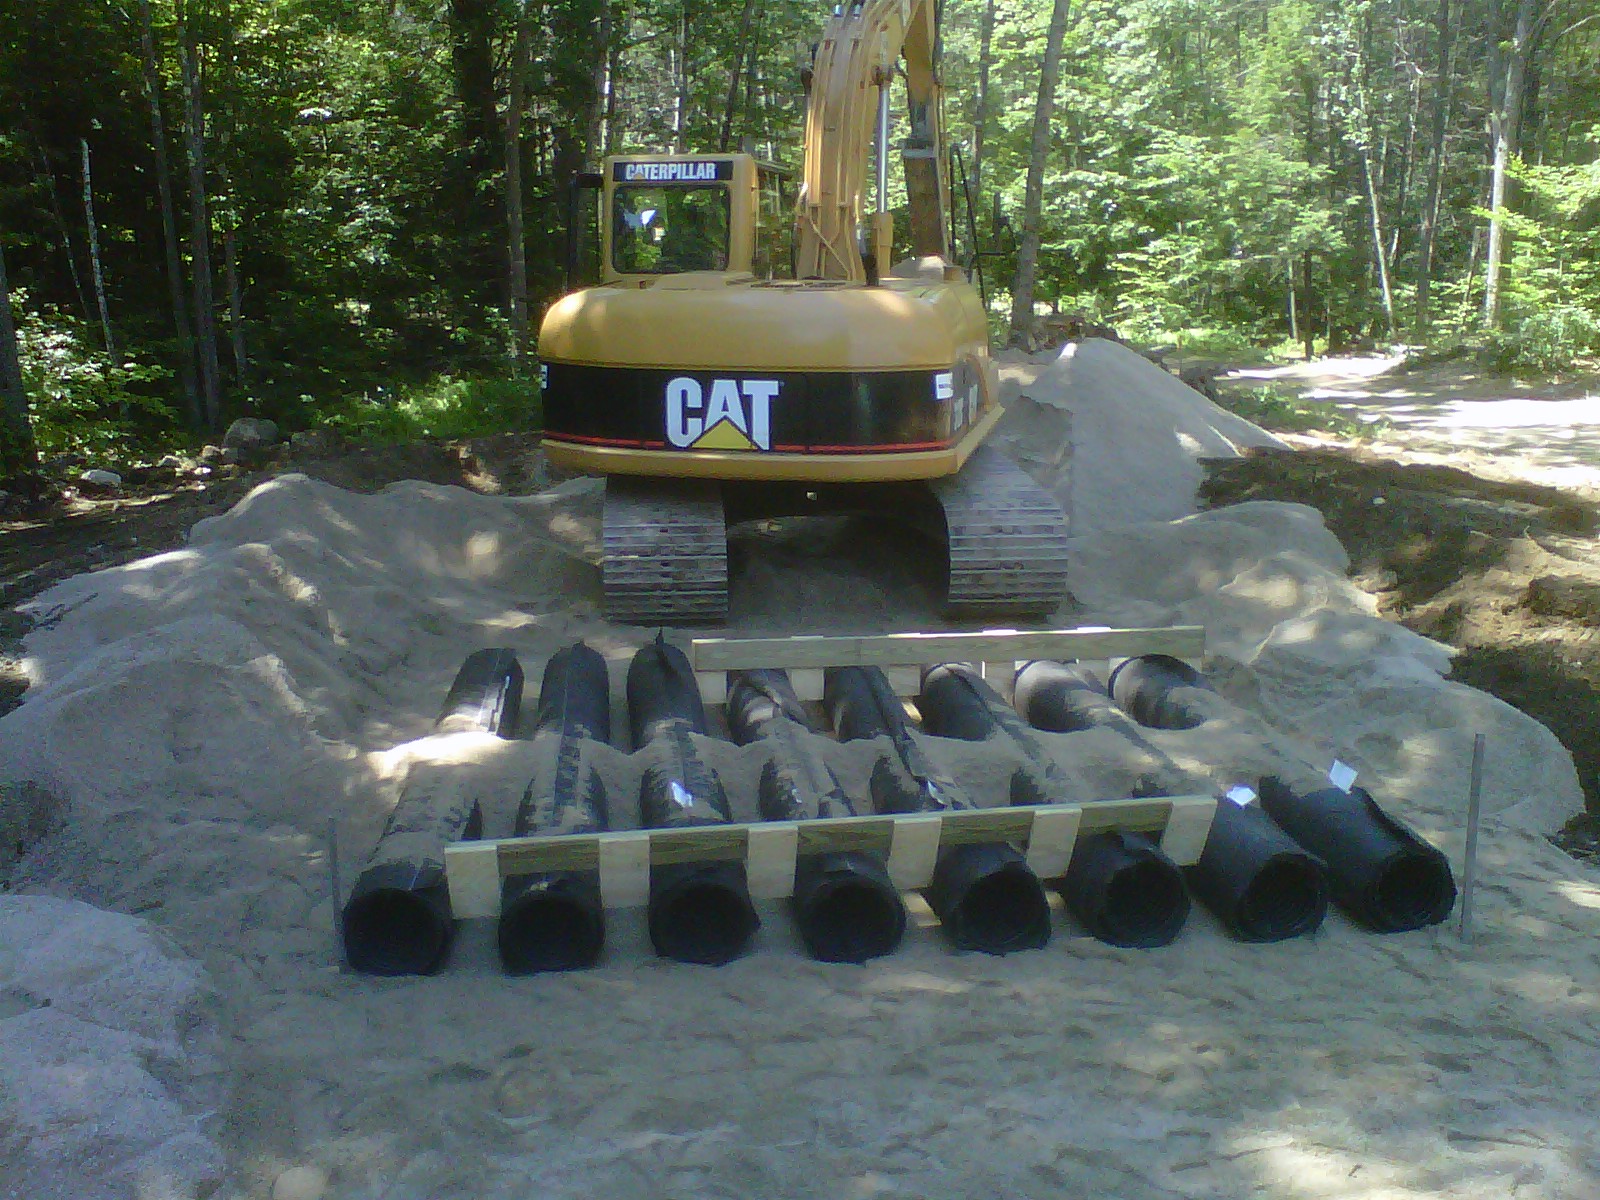
Enviro-tubes for the leach field. Thanks to Rosa Construction, a couple stone pillars for a septic system,worked out good for both of us :)


trenching for the well line


A set of steps I found on craigslist, maybe not permanent, but will work for now.


A sunday trip to prime the kitchen walls, sophia helped :)


4th of July!


You might be a red-neck if......your canoe doubles as your above ground pool.....


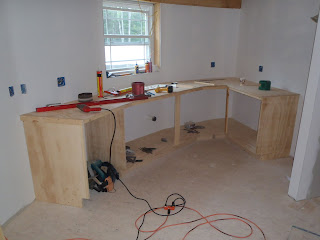
Dads handy work, feels good to see the kitchen come together.


Ledger trim detail: Thanks to Eric for putting some hours in on the trim work.


either that's a huge machine, or the house looks small.....


Temp posts are pushed back to make room for what we've all been waiting for......


There she is! I bought this spiral staircase even before we bought the land, we've been staring at it in basement for almost 2 years, rebuilding the treads to meet code, talking the death out of how we would address all the details, and its finally in, THANK GOD. we're still figuring out the details as we go, what a learning experience this has been......we're still dont know how it will look when its all said and done, but for right now we just need to meet code, soon enough....


Sunday, February 27, 2011

As of Feb 27.......

Heres the latest. We have the floors completely framed, the loft finish floor/kitchen finished ceiling is done. We'll be spending next week working on the loft balcony/hallway, and getting started on insulating the ceiling, along with the finished pine ceiling (both at the same time) This will be tedious, but it will be great to have it all done. No electrical buried in the ceiling, so we have the go ahead to insulate and cover the ceiling. Thats about all for now, here are the pics.


looking up from the basement

standing in kitchen looking towards dining area (south windows)

the loft, there will be a wall there eventually


Tough to get a picture of the whole loft, and it looks small, but its actually a very good size area

looking up a the loft floor/kitchen and dining ceiling

Main floor bathroom,

custom hanger to support the loft hallway beam

the balcony/hallway. you will step out onto this when you exit the staircase at the loft

looking at the balcony from inside the bathroom


Saturday, January 15, 2011

Back to work!

With the holidays behind us, we're back to work. Having the wood stove and electricity makes the work a bit more enjoyable. Over the holidays we focused on the round headers. After making the jig, and trying to bend a few different materials we determined we needed good clear pine, and it needed to be no thicker than 3/16" thick to make the 5' diameter bend without stressing the material. After the first few layers we got the hang of it, all in all, it was a great learning experience, much more difficult, and time consuming than I anticipated, but well worth the time and effort. The first header is finished and installed, the second (loft header) is in the works right now.

Loft beams have been ordered, and should be ready some time next week, I'm looking forward to seeing this part of the project come together. Here are some pictures to bring us up to date.


dad and I strapping / clamping a layer onto the header
the form

finished header (7-1/2" tall x 3" thick, 5' diameter)

temp posts for positioning the main floor header

header w/first four joist in place.

view from above (braced to keep everything aligned)

great view looking in from the back yard

2x12 floor joists getting notched for radiant tubing (easier to do now, rather than later)

Home sweet home :) "It was a one dog night" (as Gary said)

Finally standing on the main floor !!

We were able to use the cut off scrap from the full sheets to fill in the remaining "pie pieces."

Thats how Dan and I left it on Friday, Looking forward to getting back and